Some of the links below may be affiliate links. This means that, at zero cost to you, I will earn an affiliate commission if you click through the link and finalise a purchase. All product recommendations are products that I have used and loved, or products that I would recommend based on experience.
Teaching is exhausting. Don’t you wish someone would just give you all the ideas and a lesson plan that saves you time, so that you can just get on with the job of teaching?
Wouldn’t it be great if you could tick off several curriculum outcomes using just one picture book?
What if the learning experiences provided students with opportunities for deep learning, problem solving and creativity and integrated fun, hands-on learning experiences?
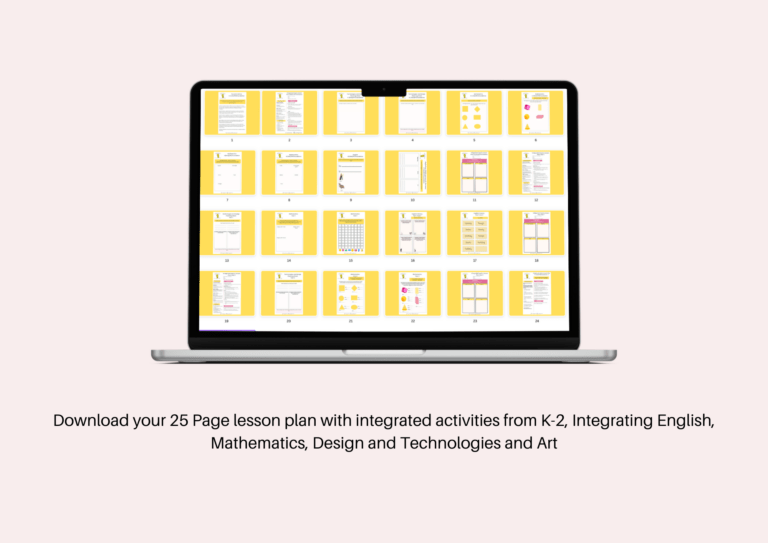
My lesson ideas for Q Pootle 5, will help you achieve all this, and in addition be fun for all involved. Isn’t that better than trying to keep children desk bound?
By the end of this post, you will see just how beneficial and helpful it is to integrate several learning areas in order to maintain your sanity and energy and give your students an opportunity to develop their problem solving and thinking skills.
How to integrate different curriculum areas
I usually start my planning by looking at the Science or Social Studies curriculum. I then base my literacy and texts around that. I keep Math separate but find areas that can be integrated.
When to integrate QPootle5 in lesson planning?
Kindergarten/Pre-Primary/ Foundation
You might decide to read Q Pootle 5 when you explore the letter Q, or perhaps an author study around some of the fabulous books written by Nick Butterworth. Experiences around literacy, Math, Art and Design and Technologies can also be linked.
Year 1
In Science, Year 1 students learn about the observable changes that occur in the sky and landscape. You will be exploring the phases of the moon (observable changes), so you could include this text which you could also use for art, Literacy, Math, and Design Technologies.
Year 2
Year 2 Science, students explore how the earth’s resources are used in a variety of ways and they explore the characteristics and properties of materials and individual components that are used to produce design solutions in Design and Technologies. Literacy, Math and Art can also be included.
Design Technologies
Q Pootle 5 by Nick Butterworth is the ideal picture book to integrate Design Technologies amongst other areas, into K-2 learning experiences. Design and Technologies is probably the one curriculum area which is most fun for kids and one that is guaranteed to get kids excited about learning.
The Australian Curriculum separates Technology into Digital Technology and Design and Technologies. https://www.australiancurriculum.edu.au/f-10-curriculum/technologies/structure/
We are going to focus our attention on Design and Technologies. In these early years the focus is on concepts, skills and processes, and students are encouraged to explore and investigate technologies. The one thing that has to be emphasized here is that this is NOT about the end product, but the PROCESS of design and solutions.
The video below from the Australian Curriculum explains beautifully the benefits of Design and Technologies and how it allows kids to explore solutions for the future.
7 Learning experiences with Q Pootle 5
The lesson starts with reading the story about a little alien called Q Pootle 5 whose space ships breaks down and he finds himself on earth trying to find a solution for his broken rocket booster, so that he can join his alien friends on the moon, for a moon party.
This lesson has no set time frame. It all depends on how many areas you would like to include.
Integrating Design and Technology
The obvious choice here is for children to design and build a space ship. The learning occurs in the planning, design and execution of the space ship. Not how pretty it looks. The idea is to inform students of the materials they have, and they are to consider how they will use these materials sustainably, and how they will connect the differences pieces together.
The process begins with a design and a plan. They draw and label their design and decide on the materials they will use. A template is included in the lesson plan download.
Next, they build and create their space ship either independently or with you scaffolding – not doing it for them! When you assist you must respect the child’s wishes, and place objects where they instruct you to – even if you know it’s not going to work!
During this process you should be asking lots of questions to get kids thinking.
- How are you going to connect these two pieces?
- How can you make sure it stands and doesn’t fall over?
- Are you following your design, if not why not?
- Why have you made this change?
- What do you need to do to get it to …?
- Why do you think those pieces won’t stick together?
- Why do you think this has happened?
After they have completed their space ship, they then take a photograph of it, using either a camera or an ipad. And just like that you have also introduced digital technology, so you can tick that box too! You will need to teach them how to take a good photo, how to import it and how to print it to the correct size so that it fits in the space on their planning sheet.
The last step is often overlooked by many, but is essential for critical thinking. This is when they evaluate their design.
- Did their design work?
- Did they have to make changes, and if so why and what changes did they make?
- Did the changes help the design?
- Did they use the materials they planned originally or did they use different materials? Why?
As you can imagine this project cannot be done in one lesson. This is a whole day activity or one done over several days. It takes as long as it takes!
Considerations
In Kindergarten/Pre-Primary and Year 1 children may need more scaffolding, and of course a lone teacher cannot possibly provide assistance to 25 students simultaneously! If you’re homeschooling, this is a walk in the park, but if you have a class of students, you need to call in the cavalry.
You will either have to get just a few students at a time working on this so that you and your education assistant can scaffold, or invite parents/grandparents in for the day to help their children – with strict instructions that they are not to interfere in the child’s design process. Perhaps print off your critical thinking questions in the Lesson plan pack and have them at workstations to encourage adults to ask questions as they scaffold the children.
A note on providing materials for the project.
Sustainability is a cross-curriculum priority in the curriculum. The materials used for the space ship should be sustainable and recyclable. Have a tub somewhere in your space to collect recyclable items throughout the year that can be used for projects such as this. These could include empty tissue boxes and toilet rolls, bottle tops, milk bottles (washed!), string and yarn, empty food cans (washed!), take-away food containers (washed!), fabric scraps, cardboard etc.
In addition to recyclable materials, you also need tape, string, glue, scissors, a pair of pliers, wire and perhaps a hot glue gun and cutting knife – which of course is used by an adult under instruction from the student.
REMida, https://www.remidawa.com/ a Reggio Emilia inspired creative reuse education centre, here in Perth WA, collect and repurpose unwanted materials from industry. They take their inspiration from Reggio Emilia. You pay an annual fee and can collect items as many times as you like. Check out their website for more information. You may have a similar resource where you live.
I have provided a Design and Technologies planning template that can be used for all Early Years students. PP and Year 1 will need more scaffolding, and most Year 2 students can complete it independently or with some scaffolding from an adult.
The skills that children learn in Design and Technologies
The skills that children learn as they design and create their models is probably the most valuable part of this experience. They are learning how to follow a sequence of steps, using equipment safely, working collaboratively and sustainably with the available materials, having to problem solve and think critically about the construction in terms of what works and what doesn’t. This is the reason why asking questions that get kids thinking is so important. Our questions cannot be shallow, but must encourage deep thinking and wondering.
Inquiry Questions to spark thinking and problem solving
The inquiry process is driven by curiosity and wonder. It is an approach that involves exploration of the world around us by asking questions, hypothesizing, testing hypotheses, and then searching for new answers in order to understand.
The educator is a facilitator, assisting students to find their own answers through this whole process of inquiry. Inquiry is a strategy in Project Based Learning, where a student works on an individual project, and in order to find the answers to questions, the student may complete the whole cycle of inquiry from questioning, hypothesizing, searching for answers, testing, and finally gaining new understanding.
Explaining the inquiry process is a topic for another post. So, make sure to subscribe below to get more information on that, and check out this post on how to encourage curiosity in children.
Questioning, forms the basis for raising thinking individuals. Every lesson should start with some focus or inquiry questions. As teachers, we may pose our own questions, but we should also be asking our students what questions they have, what they think about this topic, or what they are wondering about.
Our questions will vary depending on the age of the children we teach, starting off with some wonder questions for the very young, and becoming more sophisticated as children become more capable. We should NEVER underestimate children though. There will always be those that are capable of far more than we think!
What kind of questions might we pose for our lessons on Q Pootle 5? Here are some that I can think of. Feel free to add your own to the list.
- Where do you think Q Pootle 5 is from? Why do you say that?
- Why do you think he needed a rocket booster to fly his space ship?
- How does a rocket booster work? What does it do?
- Do you think we could live on the moon? Why/ Why not?
Integrating Mathematics, English and Art
Mathematics – shape and data
All those recyclable items that children are using to build their space ship, can be used to sort, describe and name 2D and 3D shapes. Naming, counting and recording how many cylinders, cubes, rectangles or circles etc. there are, and then capturing that information in a picture graph or sticky note graph which are great hands-on activities for children to begin learning about capturing and recoding data. Much more interesting for kids than worksheets!
To record a student’s knowledge an understanding for assessment purposes, a simple conversation and then taking a photo of the graph is all that is needed. You could also record the conversation on an ipad or on an app like Seesaw if you need to have evidence of your students’ learning.
Literacy – oral language
Oral language is a huge indicator of reading and writing success, and many children are missing the mark these days when it comes to oral language. Having opportunities to speak and listen especially these days when kids are passively watching screens, is vital if we are to nurture successful readers and writers.
If children struggle to express themselves orally, they’ll struggle to express themselves in written form later on, so do not rush writing, rather get the foundations right first!
Retelling the story in their own words is a great opportunity to do just this. Retelling is also a way to check for understanding. I love Pie Corbett’s strategy for teaching writing. I have found great success in my own teaching practice teaching kids to tell a story before writing it. Have a look at all Pie Corbett’s books here. I’ve used my copy of How to Teach Story Writing at Key Stage 1 to death. The books help you step by step to teach writing through oral language with lots of ideas for drama, role-play and model stories are provided based around Pie Corbett’s teaching strategy. You can check him out in action on You Tube.
Literacy – Vocabulary
The ability for children (and adults) to express themselves well, depends on the richness of their vocabulary. When we start planning a literacy unit around a text, we will be focused on building children’s phonological awareness, and vocabulary. In your preparation, look for tier 2 words, these are high frequency words for mature language users. These are not sight words, but words that we use to extend our oral and eventual written expression. In Q Pootle 5 these would be:
Carefully
Thought
Broken
Friendly
Earthling
Perhaps
Starter
Rumbling
Suddenly
What can you do with these words?
- Break them up into syllables, by clapping the syllables e.g., care-ful-ly
- Use them in a sentence to make the meaning clear.
- Act out the words to make the meaning clear.
- Show children pictures of the words so that they understand what the words mean.
- Are there homophones? You may need to explain the different meanings e.g. starter. It could be a starter button, the man who fires the gun an athletics meet is called the starter and even the culture for baking sourdough bread is called a starter!
- Write the words onto card and have them up on your word wall, so that they are visible and encourage children to use them in their storytelling.
- You can also look at the endings (suffixes) in Year 2 e.g. -ing (rumbling, earthling) and -ly (friendly, carefully, suddenly) and make sentences using these adverbs to make sentences more descriptive. Remember children should say their sentences and be able to use these words verbally, before jumping straight into writing.
Literacy – Narrative
Narrative writing is a massive skill for children to learn. Writing follows oral language, so focus on that first.
Kids can write their own story based on QPootle 5 where they create their own alien character. QPootle5 is great for modelling the story structure or story mountain. Just like Pie Corbett teaches, children then substitute the characters in the story with their own, and create their own problem and resolution.
In PP, students may create their story by simply drawing the beginning, or the problem, or the end, and then tell you their story so that you can record it, either by recording them telling you the story, or scribing the story for them. A topic of a future post will be how we collect evidence of our students’ learning, so make sure to subscribe below so you don’t miss out on that post.
In Year 1 and 2, students can create their own book by writing and illustrating their own story. Children love seeing themselves as authors, so inviting them to create their own stories and books is essential if we are to foster a love for writing. I cannot tell you how many books my students have written over the years by stappling a few pages together and then writing stories. Who cares if they aren’t perfect, it’s the ability to be creative that matters most when it comes to creating a narrative. You want kids to enjoy the creative process not stress them too early about the end product!
Literacy – Reader’s Theatre
Q Pootle 5 contains lots of dialogue, and is therefore a fabulous choice for reader’s theatre. This would be great for kids in Year 2. Reader’s theater is a strategy for developing reading fluency. The idea is not for children to learn the story off by heart, but to read a script of the story. Books with lots of dialogue are perfect for this. In our little story kids can take the role of the different characters as well as a narrator. They read through the parts several time, each time improving their fluency. You could have a different group of students reading on different days, so that by the end of a week, all children have had a turn. Check out how to implement Reader’s Theatre here https://www.oise.utoronto.ca/balancedliteracydiet/Recipe/00157/
Art – sculpture
Although the space ship is created through the process of Design and Technologies, the final product also qualifies as sculpture. As part of the art curriculum, one outcome calls for student responses and feelings about artwork they create or view. Asking students to write a personal response about their sculpture is an easy way to tick this box. You could even display the final works as part of an art exhibition which you could open to the community.
I hope that this post has helped give you the confidence and understanding of how to integrate across several curriculum areas using a single resource like a picture book. Please share this post with others that may benefit from it, and I would be really thrilled if you would subscribe below to receive my monthly newsletter.